Powered By Blogger

Thursday, November 14, 2013

Substitute for Cream Cheese Frosting

Ingredients:

5 tbsp. Flour
1 c. Milk
1 tsp. Vanilla Extract
1 c. Butter
1 c. Granulated fine Sugar
(not powdered sugar!)


 Direction:

In a small saucepan, pour in flour and milk, and use a wire whisk to stir constantly while heating it up. It needs to thicken. At first you think nothing will happen because the mixture is very thin. But this will change, trust me :-)
It has to be very thick. Stir and stir and stir so it won’t burn to the saucepan’s bottom. When it is thick enough, remove from heat and let it cool completely to room temperature. You really should stick to this, it must be completely cool before you stir in vanilla.

While you wait for the mixture to cool down to room temperature, cream the butter and sugar together until it is all light and fluffy.

Now it is time to add the cooled flour mixture and beat it all together with a hand mixer. It can look seperated at first, if it does, beat it a little longer. Beat it until it looks like whipped cream.

When the frosting is looking yummy AND tasting yummy (come on, give it a try!) you can spread it on your cooled red velvet cake.

HAPPY EATING! :)


Friday, November 8, 2013

Banana Foster Truffle

Bananas Foster Truffles 
 (makes about 36pcs.)


Ingredients:

4 tbsp butter, divided use
1/4 cup brown sugar
1 tbsp rum (optional, can substitute vanilla extract or rum flavoring)
1/2 tsp cinnamon
Dash nutmeg
1 ripe banana
3/4 cup heavy cream
8 oz chopped semi-sweet chocolate
1/2 cup cocoa powder, for dusting
 

Preparation:

1. Place the chopped chocolate in a medium bowl and set aside for now. Melt 2 tablespoons of the butter in a 7" skillet over medium heat. Once melted, add the brown sugar and stir it until the brown sugar melts as well. 

2. Add the rum, cinnamon, and nutmeg, and stir until the mixture is bubbling and fragrant. 

3. Place the banana slices in the middle of the sugar, and cook them for one minute on each side—no longer, or they will start to get overcooked and mushy. 

4. Once cooked on both sides, remove the banana slices from the saucepan. Add the heavy cream to the saucepan—the cream will first cause the sugar to seize and you might have bits of hardened sugar floating in your cream.

5. Whisk the cream and sugar together over the heat until the sugar dissolves, the mixture is smooth, and the cream is almost boiling. 

6. Pour the hot cream over the chopped chocolate in the bowl and let it sit and soften the chocolate for one minute. Once softened, whisk the cream and chocolate together until it is smooth and no bits of chocolate remain. 

7. Add the remaining 2 tablespoons of butter and whisk it into the chocolate. Chop the roasted bananas into small pieces and stir them into the melted chocolate as well. 

8. Press a piece of cling wrap on top of the chocolate and refrigerate it until it is firm enough to scoop, about 2 hours. If it is refrigerated longer and is too hard, let it sit at room temperature until it can be easily rolled. 

9. Place the cocoa powder in a bowl and dust your palms with cocoa. Use a candy scoop or a small teaspoon to form 1-inch balls of ganache. Roll them between your hands to get them round. If they start sticking, dust the balls with a little cocoa powder. Repeat until all of the truffles have been formed. 

10. Store Bananas Foster Truffles in an airtight container at room temperature for up to two weeks. For best taste and texture, allow them to come to room temperature before serving.
 

Simple Choco Cream Cheese Truffle

chocolate truffle 


Ingredients:

3.5 cups powdered sugar
8 ounces softened cream cheese
4 ounces unsweetened chocolate
1/2 cup cocoa powder, for rolling

 Preparation:


1. Pour the cocoa powder into a shallow pie pan and set aside.

2. Chop the chocolate into small pieces and microwave it until melted, stirring after every 45 seconds to prevent overheating. Set the chocolate aside.

3. In the large bowl of an electric mixer, combine the softened cream cheese and powdered sugar. Beat the mixture on medium speed for a minute or two, until well-combined. 

4. Stop the mixer and add the melted chocolate. Beat until combined, stopping to scrape down the sides of the bowl as needed. 

5. Remove the bowl from the mixer, cover it with cling wrap, and refrigerate until the candy is firm enough to scoop, about 20-30 minutes. 

6. Once the candy is firm but not hard, scoop it into small balls using a teaspoon or candy scoop. Roll the balls in the cocoa powder and place on a plate or into an airtight container. 
When stored properly in the refrigerator, these truffles will keep for up to a week. For best taste and texture, serve these truffles at room temperature.


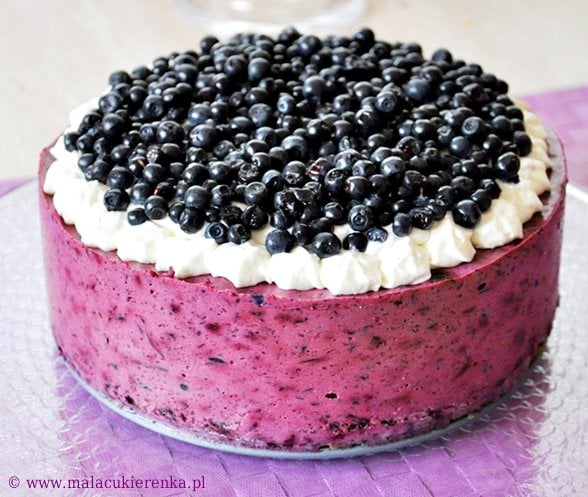
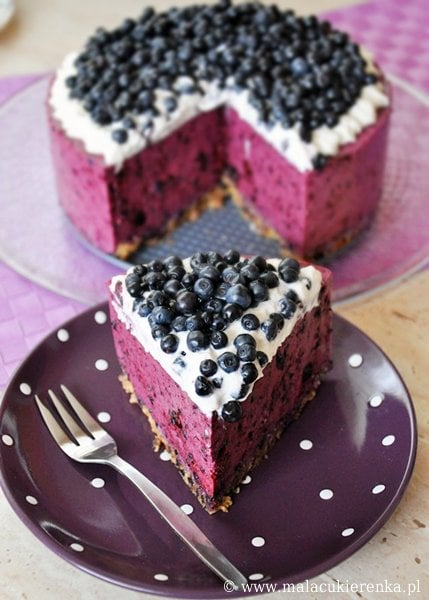
Blueberry Cheesecake


Ingredients
Crust:
100g crushed
whole wheat cookies
(store bought or home-made)
1 / 2 cup instant oatmeal
3 tablespoons of brown sugar
pinch of salt
7 tablespoons unsalted butter, melted
few drops of vanilla extract 
 
For the filling:
40g powdered gelatine
1/4 cup water
400g cream cheese, softened
250ml heavy cream 30%
1 cup sugar (if you like more sweet add more sugar)
1 tablespoon lemon juice
3 cups blueberries, washed and drained 
 
For the topping:
250ml heavy cream 30%
3 teaspoons of vanilla sugar
1 cup blueberries, washed and drained 
 
Crust & Filling:
1. Mix together crushed cookies, oatmeal, sugar, s
alt, butter and vanilla. Press into the base of a 2
0cm
round x 9cm (8”x 3½”) springform pan and bake at 3
50°F (180°C ) for 12-15 minutes. Remove from
an oven and cool completely at room temperature.
  
2. Soak the gelatin in a 1/4 cup cold water (for ab
out 10 minutes), and then put on a fire and warp up
,
stirring, until dissolved.
3. Mix together cheese, heavy cream, sugar and lemo
n juice.
4. Puree blueberries in a food processor(a blender
will work fine) and mix with cream cheese mixture.
5. Start stirring cheese mixture slowly, while pour
ing the warm gelatin, after ingredients have
combined, let it stand for a few minutes until it s
tart thickens.
Now spoon over the mixture evenly into the chilled
base, smooth the surface and refrigerate for about
4-5 hours, but best to leave overnight.
Before you unlock the spring form pan, run a knife
around the edge of the cheesecake.
Topping:
6. Whip the heavy cream with vanilla sugar. Cover t
op of the blueberry cheesecake with whipped
cream and blueberries
 
 
image&recipe by: CLICK HERE

Monday, November 4, 2013

Blueberry Crumb Bars

blueberry crumb bar 
(serves: 36)


Ingredients 
 
1 cup white sugar
1 teaspoon baking powder
3 cups all-purpose flour
1 cup cold unsalted butter (2 sticks or 8 ounces)
1 egg
¼ teaspoon salt
Zest and juice of one lemon
4 cups fresh blueberries
½ cup white sugar
4 teaspoons cornstarch
 
Instructions

1.)Grease a 9×13 pan.
 
2.)Preheat oven at 375 degrees.
 
3.)Mix together 1 cup sugar, flour and baking powder. Mix in salt and lemon zest. Use a fork or pastry cutter to mix in cold butter and egg. (Dough will be crumbly).
 
4.)Pat down half of the dough into the greased pan.
 
5.)In a separate bowl mix ½ cup sugar, lemon juice and cornstarch. Gently add in blueberries.
 
6.)Pour blueberry mixture over crumb bottom evenly. Crumble the remaining dough over the top to cover.
 
7.)Bake for about 45 minutes or until it is just golden on top. *Mind your personal oven, there may need to be adjustments on time.* Cool completely and cut into squares. These are unusual in that the fridge is best for storage.
 
making the pastry 
making the dough
 
patting down the base

spreading the blueberry filling 
spreading the blueberry filling

ready to bake 
ready to bake
 
just from the oven
just from the oven

blueberry crumb bars 
the finishing!!! yummy!!!


***RECIPE&IMAGE BY: CLICK HERE

Green Cake Recipe

Almond cake coloured green for Halloween 


Preheat oven to 350 F (175 C)
9″x13″rectangle cake pan, prepared with parchment paper or cake release
 
 
Ingredients:

375 grams sugar (2 cups)
250 grams soft unsalted butter (9 oz)
3 large eggs
250 grams all purpose flour (1 3/4 cup)
1 1/2 teaspoon baking powder
pinch of salt
250 ml milk (room temperature) (1 1/8 cup)
2-3 teaspoons almond extract (Vanilla can be used instead)
Green food colouring 

Cocoa icing:

Powdered icing sugar (I never really use any measurements for this. I just add 1 cup or more)
unsweetened cocoa powder (Use a little less than the amount of powdered icing sugar)
A few tbsp of boiled lukewarm water


I don’t really use any specific recipe for the icing. I just take 2-3 cups of powdered sugar. About 1/2 cup of cocoa powder and whisk it well together. Then I add 1-2 tablespoons of cooled boiled water and mix it in. Add more water if its to thick and more powdered sugar if its too thin. It should have a thick pouring consistency, that is easy to spread on with a spatula.

Step 1:
In a bowl sift together the all purpose flour, baking powder and a pinch of salt. Set aside.

Step 2:
In another bowl cream the unsalted butter and sugar well together.

Step 3:
Add the eggs one at a time, mixing well in between. Scrape down the sides when needed.

Step 4:
Next add the flour mix in three parts and the milk in two. Mix well in between.

Step 5:
Stir in the almond flavour. Then add drops of green food colouring. Be careful not to use too much food colouring as the colour gets a little more dark while baking.

Step 6:
Pour the green cake batter into the cake pan and smooth with a rubber spatula. To avoid the cake from getting too brown, place the cake on the lowest rack in the oven. Bake the cake for about 40-60 minutes and a cake tester comes out clean.

Step 7:
Transfer the cake to a cooling rack and let it cool completely before you spread on the cocoa icing. Cut the cake into squares and enjoy.


***RECIPE&IMAGE BY: CLICK HERE


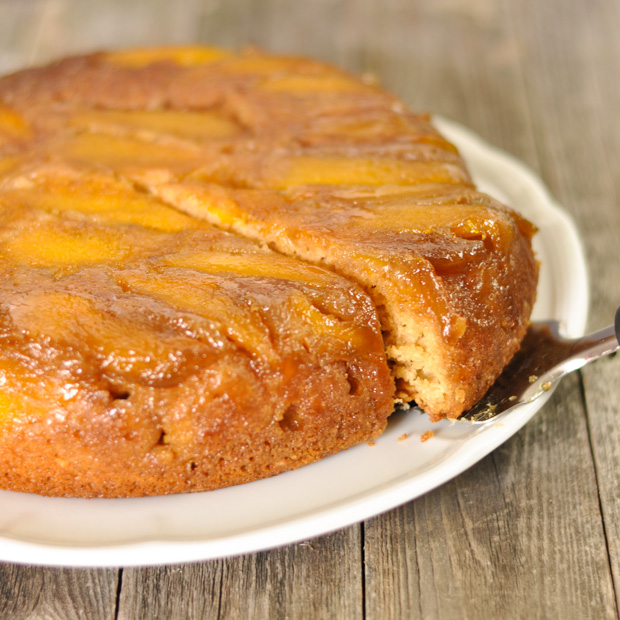
Mango Upside Down Cake

Mango Upside Down Cake 
(serves: 8)


Ingredients

1 stick melted unsalted butter
½ cup brown sugar
1-1½ Mangos sliced
1 cup Buttermilk
2 eggs
1 cup Sugar
2 cups Flour
1 tsp baking soda
½ tsp salt


Instructions

1.)Preheat oven to 350 degrees.
2.)Melt butter and allow to cool a bit.
3.)Carefully pour ½ of butter into the pan and move around to keep from sticking.
4.)Sprinkle the brown sugar over the butter evenly.
5.)Place the sliced Mango pieces in a single layer over sugar.
6.)Combine Buttermilk, the remainder of butter, eggs sugar, flour, baking soda and salt.
7.)Mix till well combined.
8.)Pour batter and spread evenly over Mango slices.
9.)Place the cake on a lipped cookie sheet and bake from 45 minutes to 1 hour depending your oven.
10.)Allow to cool for at least five minutes before transfer.
11.)Carefully flip onto a plate or cake stand.
 
Notes
*You can also use a Cast Iron Skillet in making this
 
 ***RECIPE&IMAGE By: CLICK HERE

Chocolate Peanut Butter Banana Upside Down Cake

peanut butter chocolate banana cake 


Prep Time: 25 minutes
Cook Time: 1 hour, 5 minutes
Total Time: 1 hour, 40 minutes
Yield: 12 to 15

Ingredients: 

3 sticks unsalted butter, softened, plus more for the pan
3 cups all-purpose flour
1 tablespoon baking powder
1/2 teaspoon salt
2 cups granulated sugar
4 large eggs
1 teaspoon pure vanilla extract
1 cup milk
3 ounces bittersweet chocolate, melted
3/4 cup chunky peanut butter
1 cup dark brown sugar
4 bananas, halved lengthwise

Instructions:

1.Preheat the oven to 350° and lightly butter the sides of a 9-by-13-inch glass baking dish. In a medium bowl, whisk the flour with the baking powder and salt.

2.In a standing electric mixer fitted with the paddle, beat 2 sticks of the butter with the granulated sugar at medium speed until very fluffy, 5 minutes. Beat in the eggs one at a time, then add the vanilla. In 3 alternating batches, beat in the flour mixture and the milk. Transfer one-fourth of the batter to a medium bowl and stir in the melted chocolate. Beat the peanut butter into the remaining batter.

3.In a small bowl, blend the remaining stick of butter with the brown sugar and spread it in the baking dish. Arrange the bananas, cut side down, in the dish. Spoon dollops of the peanut butter batter into the dish and fill in the gaps with the chocolate batter. Gently swirl the batters together with a table knife.

4.Set a baking sheet on the bottom of the oven. Bake the cake in the center of the oven for 1 hour and 5 minutes, until a toothpick inserted into the center comes out clean. Let the cake cool on a rack for 10 minutes, then invert it onto a platter. Let the cake cool slightly, then cut into squares and serve.
 
* Recipe&image By: CLICK HERE!

Vanilla Cupcake w/ Blue Frosting!

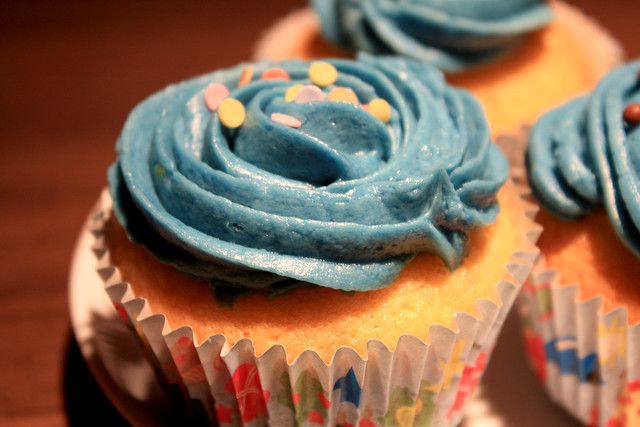
Vanilla cupcakes with baby blue buttercream frosting 


Prep Time 10 minutes
Cook Time 17-20 minutes
Difficulty Easy
Ingredients?:
1/2 cup (113 grams) unsalted butter, room temperature
2/3 cup (130 grams) granulated white sugar
3 large eggs
1 teaspoon pure vanilla extract
zest of 1 large lemon (outer yellow skin)
1 1/2 cups (195 grams) all purpose flour
1 1/2 teaspoons baking powder
1/4 teaspoon salt
1/4 cup (60 ml) milk

How to?:

1. Warm up the milk and butter, set aside when butter melted.

2. Now start to whisk the eggs, the sugar and vanilla until well blended and creamy. Do not whisk too long though.

3. Add and mix the milk and butter mixture.

4. Add the dry ingrediens and mix it all just until smooth and creamy.

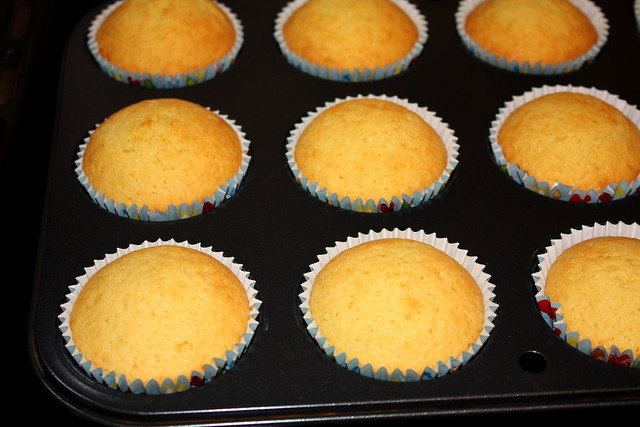
Now fill your cupcake baking cups a little more than 3/4 full. This way you get these nice domes :-)
Put the cupcake pan in the middle of your oven and bake for approx. 17-20mins (or until a toothpick comes out clean).
 Vanilla Cupcakes - perfectly domed 
*For the Frosting Recipe:  CLICK HERE

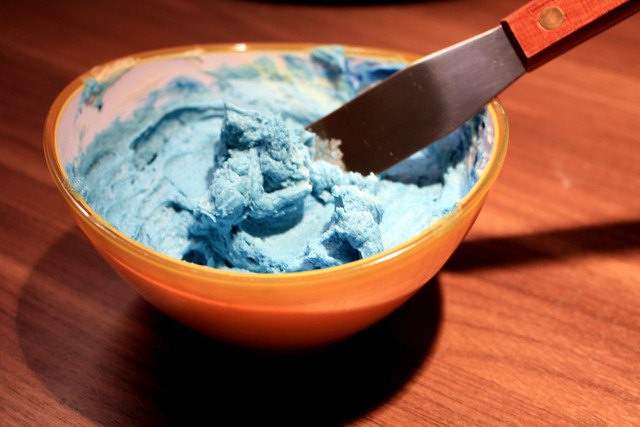
Baby Blue Cream Cheese Frosting


Vanilla Cupcakes - perfectly domed

Ingredients!:

(makes about 12 cupcakes!)


  • 2 cups sifted confectioners sugar (icing or powdered)
  • 1/2 cup unsalted butter (room temperature)
  • 4 oz cream cheese
  • 1 teaspoon pure vanilla extract
  • 2 tablespoons milk
  • If desired: Food coloring

How To?:
  • 1. In an electric mixer or with your hand mixer, cream the butter until it is very smooth and fluffy.
  • 2. Now, add the vanilla extract. On low speed, gradually beat in the icing sugar. Don’t forget to scrape down the sides of the bowl.
  • 3. Now add the cream cheese and beat on high speed until your frosting is all light and fluffy. (3mins) – I would suggest to give it a taste, if the frosting is still too sweet for you, then the milk comes into play. Gradually add milk, bit by bit, beat the frosting and taste again. Make sure it does not become too soft and runny because you still want to frost your marshmallows – so it has to have a good consistency (not too thin!)
  • 4. If your frosting is too runny, just add in a little bit more icing sugar. If you like the taste and consistency, tint your frosting with your desired food coloring. I usually use brands such as Wilton, Americolor or Sugarflair.
  • Now fill your piping bag with your frosting and frost nice swirls on top of your cupcake.


Vanilla Cupcakes - perfectly domed